Deck boards take a beating in the Chicago area. Between spring rain, summer heat, leaves that trap moisture, and winter freeze-thaw cycles, it’s common to end up with boards that feel loose, look cracked, or start to soften at the edges. The good news: many deck board problems can be repaired without rebuilding the entire deck—if you diagnose the issue correctly and fix it the right way.
In this guide, we’ll walk you through how to repair deck boards in a practical, step-by-step way. We’ll cover quick repairs, when replacement is the smarter move, and how to make the fix blend in—especially if your deck is already stained or weathered.
Start Here: Repair, Reinforce, or Replace?
Before you grab tools, you need to decide what kind of “repair” your deck actually needs. Some boards look rough but are still structurally fine. Others may look “okay” but feel spongy underfoot—which is a safety issue. The goal is simple: restore a solid walking surface and prevent the same problem from returning.
Signs a Board Can Be Repaired (Cosmetic/Minor)
If the board is still solid and firmly supported, you can often repair it rather than replace it. Common repairable issues include:
- Small surface cracks (checking) that don’t go deep
- Minor splinters or rough grain that can be sanded smooth
- Small holes from old screws, knots, or hardware
- Slight cupping that isn’t creating a trip hazard
These are typically “surface-level” problems. They affect appearance and comfort, but not structural safety.
Signs a Board Should Be Replaced (Structural/Safety)
Replacement is usually the correct call if the board has strength issues. Watch for:
- Soft spots where your foot sinks slightly
- Rotting ends, edges, or areas around fasteners
- Deep splits running along the length of the board
- A board that flexes too much (especially between joists)
- Fasteners that won’t hold because the wood is deteriorated
A quick test: press a screwdriver into the suspicious area. If it sinks in easily or the wood crumbles, the board is past “patching.”
Tools and Materials You’ll Actually Need
Deck repairs don’t require a full workshop, but the right basics make the job cleaner and safer. Plan to have tools for fastening, cutting, and finishing—because a repair that isn’t sealed often turns into another repair next season.
Best Fasteners for Deck Board Repairs
If your deck has nails that keep popping up, that’s a common older-deck issue in our region. Freeze-thaw movement and wood expansion/contraction work nails loose over time. In most cases, upgrading to quality exterior deck screws creates a stronger, longer-lasting hold.
Look for corrosion-resistant screws rated for outdoor use. If you’re near treated lumber, choose fasteners that are compatible with pressure-treated wood.
Materials for Patching vs. Replacement
For minor surface fixes, a quality exterior filler or epoxy can help (when used correctly). For structural issues, replacement boards are the safer and often faster solution.
If you’re replacing boards, match the material type:
- Pressure-treated wood to pressure-treated wood
- Cedar to cedar
- Composite to the same composite line/style whenever possible
Mixing materials can create uneven expansion and a mismatched look.
Fix 5 Common Deck Board Problems
Most deck board issues fall into a few repeat categories. The best repair depends on what’s causing the problem—not just what it looks like on top.
Loose Board or Board Movement Underfoot
If a board moves when you step on it, the cause is usually one of these:
- The fastener missed the joist
- The original fasteners backed out over time
- The joist below has shifted or deteriorated
- The board has shrunk, leaving more play at the fastener points
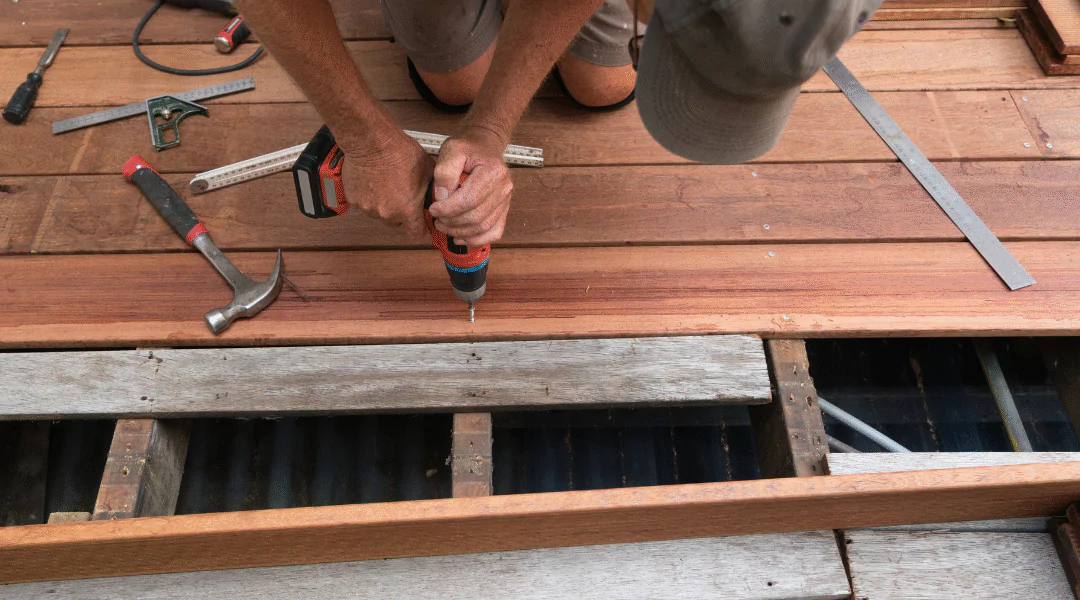
Fix: Refasten the board into solid framing. Locate the joists, then install screws where they’ll bite into sound wood. If the board still moves after refastening, you may be dealing with a framing issue (joist damage or spacing problems).
Nails or Screws Popping Up
Popped nails are common on decks that have been through multiple winters. People often hammer them back down—then they pop up again.
Fix: Remove the popping nail (or back out the stripped screw) and replace it with a proper deck screw. If the hole is worn out, you may need to move the fastener slightly or replace that board section, depending on how compromised the wood is.
Cracks, Splits, and Splinters
Surface cracks happen as boards dry and age. Small cracks are usually normal. Long deep splits, especially near edges, are not.
Fix:
- For minor cracks/splinters: sand smooth, spot-fill if needed, and recoat with stain/sealer.
- For deep splits: replacement is usually the better move. A split board can catch shoes, hold water, and worsen with each freeze-thaw cycle.
Rotted Spots or “Soft Wood”
Rot typically shows up where moisture lingers:
- Board ends near stairs or edges
- Areas under planters, rugs, or grills
- Spots where snow sits and melts repeatedly
- Near downspouts or splash zones
Fix: If the wood is soft, replace the board. Filler may hide the damage temporarily, but it won’t restore structural strength. Rot is a safety issue—especially on stairs, landings, and high-traffic pathways.
Hidden Fasteners and “How Do I Replace One Board?”
Some decks use hidden fastening systems, and single-board replacement can be trickier because fasteners aren’t accessible from the top.
Fix: You may need to loosen adjacent boards, access clips from the side, or remove a section strategically. If you’re not sure what system you have, avoid forcing boards out—this is where DIY repairs often cause more damage than the original problem.
Step-by-Step: Replacing a Damaged Deck Board (The Clean Way)
If you’ve determined a board should be replaced, this is the most reliable path to a safe, long-lasting repair. The key is to treat replacement like a small construction project—not a quick patch—so it doesn’t fail again next season.
Mark the Board and Confirm Joist Locations
Start by identifying exactly which board needs replacement. If multiple boards are questionable, mark them all and check the framing pattern (joist spacing). Most decks have regular joist spacing, but older builds and repairs can create odd patterns.
Remove Fasteners Without Damaging Neighbor Boards
Back out screws if possible. If nails are used, remove them carefully with a pry bar and a protective scrap block so you don’t dent surrounding boards. Work slowly—especially if boards are dry and brittle.
Lift the Board (or Cut It If Needed)
If the board is stubborn, cut it into sections between joists to remove it in parts. This reduces stress on neighboring boards and makes removal safer.
Inspect the Framing
This step is where “good” repairs become “great” repairs.
With the board removed, check the joists underneath:
- Is the joist top cracked or soft?
- Is there dark staining that suggests trapped moisture?
- Are fastener holes blown out or weakened?
If the joist is damaged, the repair may require reinforcing (“sistering” a joist) or additional blocking. Installing a new board over weak framing won’t hold for long.
If the framing is sound, this is also a smart moment to add protection at the joist top—especially on older decks that have already shown rot issues.
Cut, Pre-Drill, and Install the Replacement Board
Measure carefully and cut the new board to fit with the same spacing pattern as the rest of the deck. Pre-drilling helps prevent splitting, especially near ends.
Then fasten with quality deck screws into each joist. Keep fastener alignment neat—it looks better and makes future maintenance easier.
Tip for a better match: New boards often sit slightly “prouder” than old boards. A quick sanding pass after installation can help blend the transition.
Make the Repair Disappear: Sand, Stain, and Seal to Match
Replacing a board fixes safety—but most homeowners also want it to look like it belongs. That’s the hard part, especially on older decks where sun and weather have changed the color.
Matching Color on an Older Deck
New wood will usually look brighter and cleaner than surrounding boards. Even with the same stain, the result can look different.
A few ways to get a more blended finish:
- Clean surrounding boards so you’re not comparing new wood to dirt and algae staining
- Use stain samples in small test spots (not full-board guesses)
- Consider re-staining a wider section, not only the single board, for a natural fade
If your deck has a solid stain, blending is often easier. If it’s semi-transparent, the wood’s natural variation shows more, so matching can take more care.
Sealing for Weather Protection
In Chicagoland, sealing matters. Moisture that gets into end grain and cracks expands when it freezes—this is a major reason small defects grow into big repairs.
After sanding and staining, apply the appropriate sealer system so the repaired area is protected through rain and winter conditions.
Prevent the Next Repair (Chicago-Proofing Tips)
Deck board repairs are usually a symptom of a bigger issue: moisture + movement. You can’t stop the seasons, but you can reduce damage with a few smart habits.
Here are the highest-impact prevention steps:
- Keep leaves and debris cleared off the deck surface, especially in fall
- Avoid leaving planters or rugs in one spot all season—rotate them to prevent moisture traps
- Make sure downspouts and runoff aren’t dumping water onto the deck
- Schedule periodic inspections for loose boards, rail movement, and soft spots
- Maintain a consistent staining/sealing routine so water doesn’t soak into unprotected wood
If your deck boards are repeatedly failing in the same area, it’s worth looking underneath. Often the issue is drainage, framing, or an area that never dries out.
When to Call a Pro
Some deck board repairs are straightforward. Others look simple—but hide bigger structural problems. If any of the following are true, it’s smart to bring in a professional:
- Multiple boards feel soft or unstable
- The deck feels bouncy or uneven
- Railings or posts move when pushed
- You’ve repaired the same spot more than once
- You suspect framing damage under the boards
- You want the repair to match cleanly (especially with stain blending)
At Core Improve, we take an inspection-first approach. We’ll identify whether it’s a board-only fix or a framing issue, and we’ll recommend the repair path that protects the deck long-term—not just for one season.
If you’re in Cook, Lake, DuPage, McHenry, Kane, Kendall, DeKalb, or Boone County, reach out for a free estimate and we’ll help you get your deck solid, safe, and looking right again.
FAQs About Repairing Deck Boards
1) Can I repair a rotten deck board, or do I need to replace it?
If the wood is soft or crumbling, replacement is usually the safest option. Repairs can hide rot, but they don’t restore strength.
2) How can I tell if a deck board is rotted or just weathered?
Weathered boards look gray and rough but still feel hard. Rotted boards feel soft, may crumble, and often show damage near ends or fasteners.
3) Should I use nails or screws when repairing deck boards?
For most repairs, screws are the better choice. They hold stronger over time and are less likely to back out with seasonal movement.
4) How do I fix deck nails that keep popping up?
Remove the nail and replace it with a corrosion-resistant deck screw fastened into solid framing.
5) Can I replace just one deck board without replacing the whole deck?
Yes, in many cases. The key is making sure the framing is sound and the replacement board is installed with correct spacing and fastening.
6) What if the joist under the deck board is damaged?
That’s a bigger repair than a board swap. The joist may need reinforcing, added blocking, or replacement depending on the condition.
7) How do I replace a deck board if I have hidden fasteners?
It depends on the fastening system. Some require loosening adjacent boards to access clips. Forcing removal can damage surrounding boards.
8) Do I need to stain and seal the new board right away?
It’s strongly recommended. Unsealed wood absorbs moisture quickly, and that can lead to swelling, cracking, and early rot—especially through winter.
9) How do I prevent deck boards from rotting again?
Keep the deck clean, manage water runoff, avoid moisture traps, and maintain a consistent stain/seal schedule so water can’t soak into the wood.